Converting Audio Files Overview
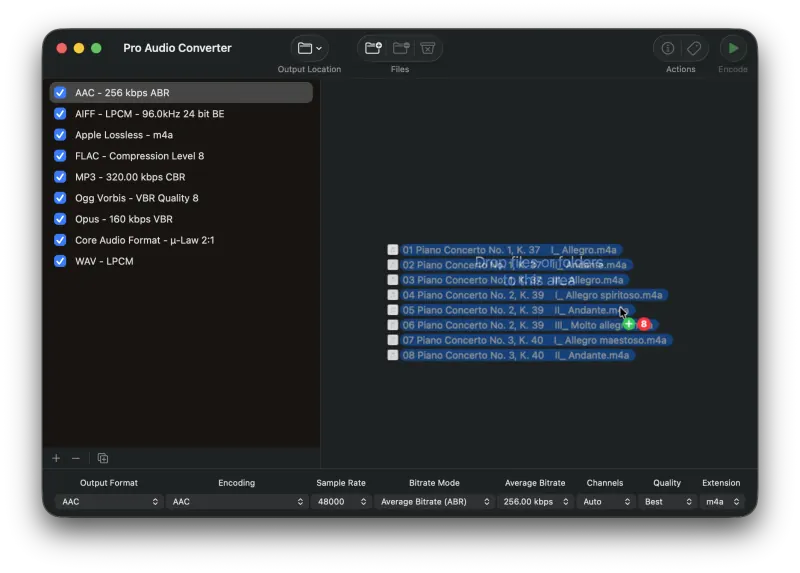
The full conversion workflow, from dropping in files to pressing Encode.
Pro Audio Converter makes it simple to convert your audio files into your desired format. Follow these four steps.
1) Add Files to the Queue
Drag your source audio files onto Pro Audio Converter to add them to the queue. Files can also be added using several other methods.
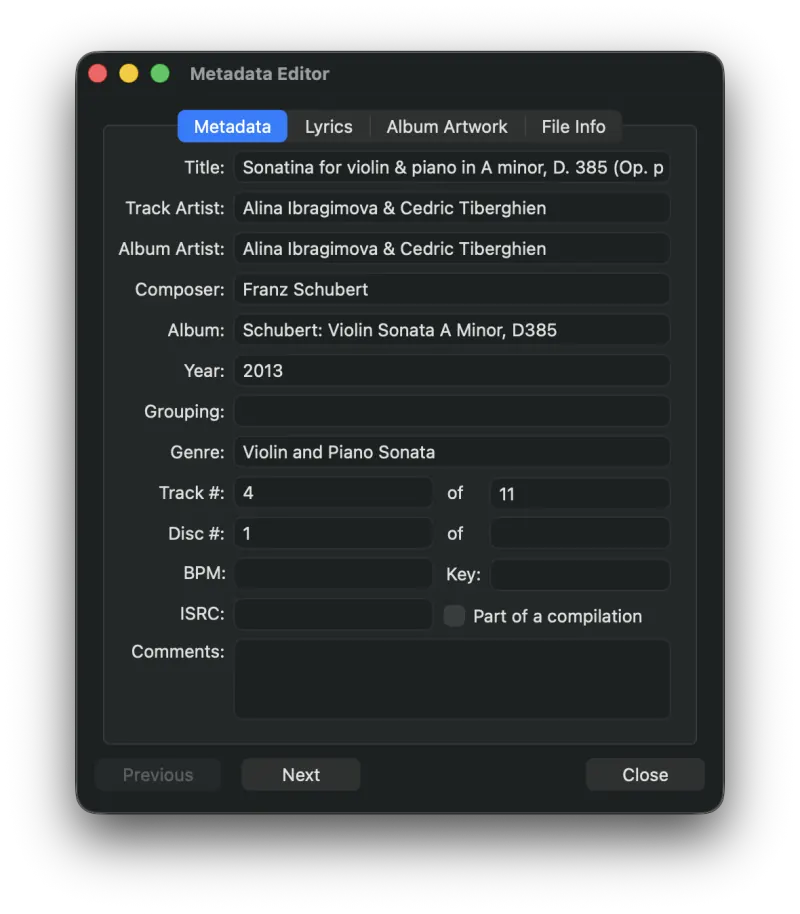
2) Edit the Metadata (Optional)
Press the Metadata toolbar button to bring up the Metadata Editor and start entering or editing information about your audio files.
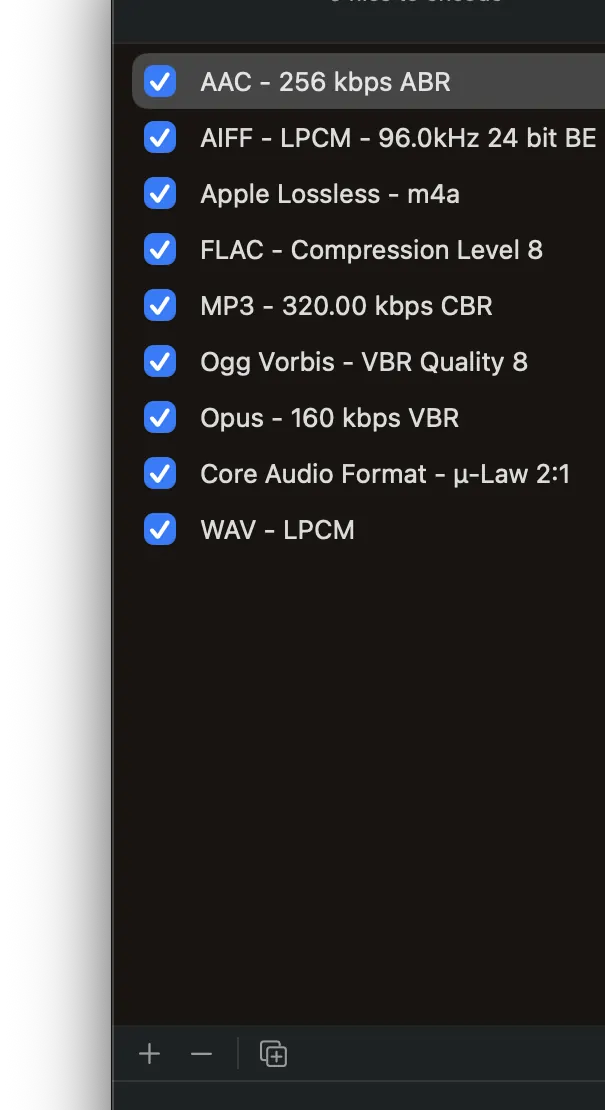
3) Select Your Output Formats
Pro Audio Converter can output to several different formats at once. Select one or more output formats and configure the desired settings for each. More information about supported audio formats can be found in the Audio Formats overview.
4) Press Encode
Press the Encode button to begin the conversion process. By default, output files go to your Music folder. You can set a custom output directory and file name in Settings.
Still need help? Email [email protected] or send a message.